Sorry this is so long, but it's kind of detailed.
So I've been in the market for one of those exercise play gyms for the baby, but they were all expensive, so I decided to make my own. I wanted it to be cushy and soft, so I decided to use fleece as the base, but, since cash is tight, I didn't want to go out to buy new. I was digging through some of our old things and came across this old picture from Halloween of my husband (isn't he handsome :-) ). I remembered that this pac man had been made of fleece and we even still had the hula hoop that was used to give it that shape that I could use for the cross bars to hang toys from.

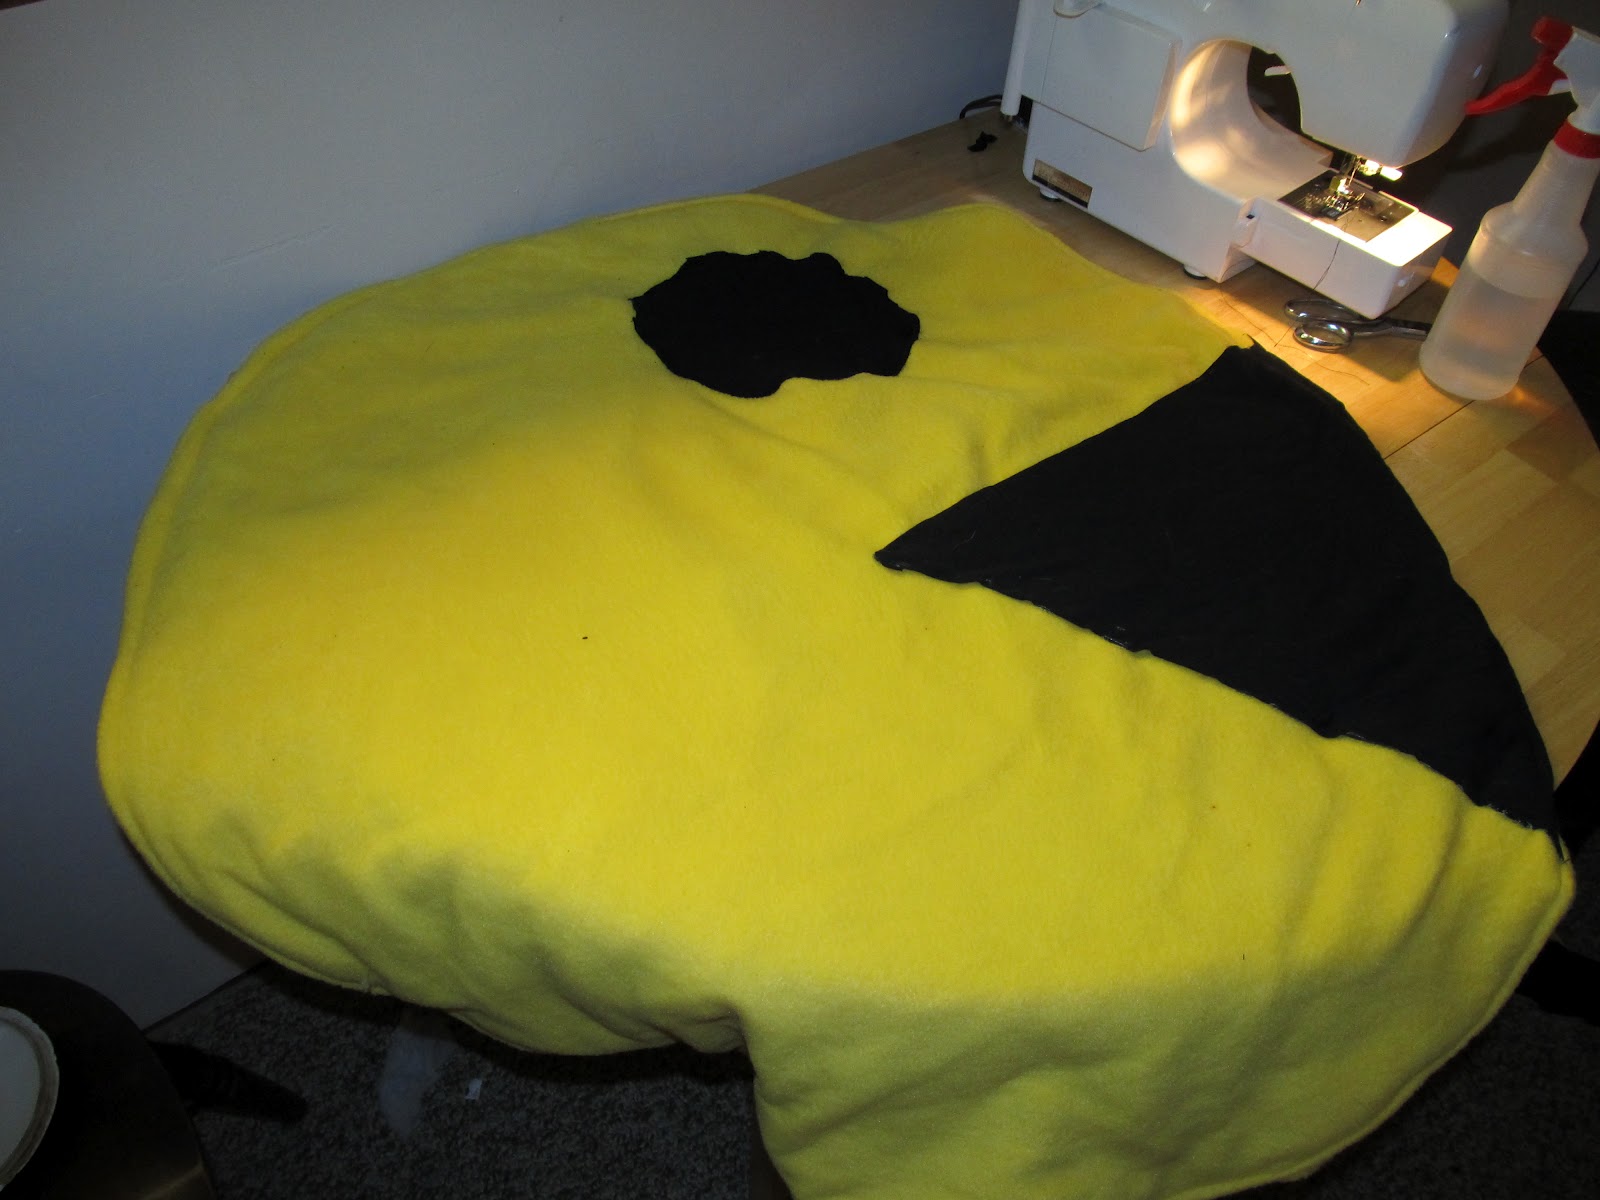
If you want to make one of these yourself, what I used to create this pac man was a standard hula hoop and I think 2 yards of yellow fleece (or just double the diameter of the hula hoop). Trace the hula hoop onto the fleece and stitch on your line leaving a space open for head and legs. Cut arm holes (if you're nice, I almost didn't because pac man doesn't actually have eyes, but I decided to be nice because he was willing to wear a hula hoop the very hard way all night and not really sit down (it goes between his legs and over one shoulder)). At the time I made the pac man I wasn't planning on it becoming a baby play gym, so I glue gunned the black wedge for the mouth onto both sides, but if you have time I recommend sewing it on instead.
To transform this bad boy into something for my sweet pea, I turned it inside out then re-stitched around the outside of the circle cutting off the old hem and leaving an opening for turning (I had to do this because when I made the original costume I didn't sew it, I glue gunned it because my sewing machine was broken at the time and it was like the day before Halloween. If you have just made your pac man, you won't need to do this). Also make sure to fill in the eye hole if you cut one with some black fabric so there isn't a big gaping hole in the play mat, I forgot to take a picture of that step.

Put a thin quilt batting (or leftover pieces from an old project pieced together like I did) over the entire pac man and stitch around the outside again to hold all the batting in place

When you're stitching on the batting, if your presser foot keeps catching on the fluff of the batting, put a piece of tissue paper down over the batting and stitch through it, when you're done, just tear it away. As you sew, the needle punctures it like a perforation so it tears away nicely.

Turn the pac man right-side-out and stitch around the edge one more time (last time I promise), making sure to tuck the edges of the opening in so they are tucked in nicely too.
I didn't like how easily the layers separated, since I was going to use it for a tummy time mat too, so I decided to do a little quilting to hold all the layers a bit tighter together. I cannot draw at ALL, luckily my husband is a Herron School of Art graduate (www.joebieschke.com) :-) (not that he really needed a whole lot of training for this, if you didn't have a resident artist, you could print out pictures to trace). I had my husband draw (with disappearing fabric marker) the 4 ghosts and some dots all over the pac man (he also drew some cherries, but I wound up not sewing them on because I was tired and it looked cute anyways).

Stitch over all your lines, if you're using fleece and batting I recommend a zigzag stitch (a straight stitch line disappears into the fleece, so if you want to actually have a black outline on the ghosts, you need to zigzag).

Spray (or brush, however your fabric marker directs) your piece with water to make the marker go away. My husband was really heavy handed with the marker so it took 5 or 6 sessions of soaking it really good with a spray bottle to get the ink all the way up. Let your mat completely dry.
Place your baby on your finished tummy time mat and enjoy. This is a vital step, view it as trying it on. Watch him (or her) for a little while and take a sewing break, the next steps won't change the mat itself any so let your baby enjoy for a while (i took about a 4 day break before I moved on, I got caught up in enjoying the weather).

To make the cross bars for the play mat, cut a hula hoop in half. An exacto knife works very well, just be careful not to cut through and cut yourself or the surface you are working on. If you have a cheap hula hoop, make sure to cut through where the tag/label is, that is the joint where the hoop is stapled to a little filler piece anyways, and would be a natural weak point if you were to leave it in. take one half of the hoop and cut about an inch or 2 off so that when the two haves are crossed over one another all the end points can touch the ground.

Cut (or piece together) two long pieces of fabric an inch or so longer than your hula hoop halves and whatever the diameter is plus an inch long (in my case 53 inches long and 3 1/2 inches wide) I used leftover fabric from the body and eye. I also sewed a long ribbon (about 12 inches long) onto the center of the lower hoop sleeve (so that I could tie the bars together securely). If you use satin ribbon like I did, to keep it from fraying, take a lighter or candle and carefully melt the edges a little (see my flip flop tutorial for good pictures of this).

Pin your hula hoop half covers in half the long way with right sides together. Using more ribbon (about 3 - 4 inch pieces) melt the edges again and make little loops, Pin them into your hula hoop covers so that you have places to hang little toys on the final piece. Make sure you pin them with the loop to the inside of the tube as you sew it.

Once you have the whole tube pinned, stitch down the whole length of the tube, but do not stitch shut the ends.

This is the most tedious part, turn your tubes right side out. It can take a little while, just be patient. I recommend sitting in front of your favorite TV show and turning the tubes as you watch, it makes the task seem shorter.

Put your hula hoop halves into the tubes and try them out (but don't let the baby try it out yet, the hoop halves can tip over onto them, it probably wouldn't hurt them outright, but it wouldn't be safe and it would probably startle your baby).

To stop the hoop halves from tipping over I took some spare ribbon I had (but you could use string or a fabric that doesn't have any stretch to it, whatever you have, it'll only show a little around the edge of the mat) and stitched it to the ends of the tubes (with the hula hoop inside) making sure the ribbon is pulled tight so that the hoops have some tension to their arc. Also stitch where the two ribbons cross, this, plus tying the two hoops together on the top keep them from tipping over onto your baby.

Then add some of those baby link thingies to your ribbon loops and attach some toys for your baby to play with.

TA DA! Enjoy your new custom play mat for your baby :-)

No comments:
Post a Comment